
Firewall
The Firewall allows you to manage traffic in a MaxProtocol network through a set of rules that define which sources have access to which destinations. Rule priority is determined by their order in the list — rules are applied top to bottom.
Opening the Firewall
The firewall can be accessed in two ways:
- From the settings menu on the network page → Firewall
- From the context menu
⋯in the network list → Firewall
Firewall Page
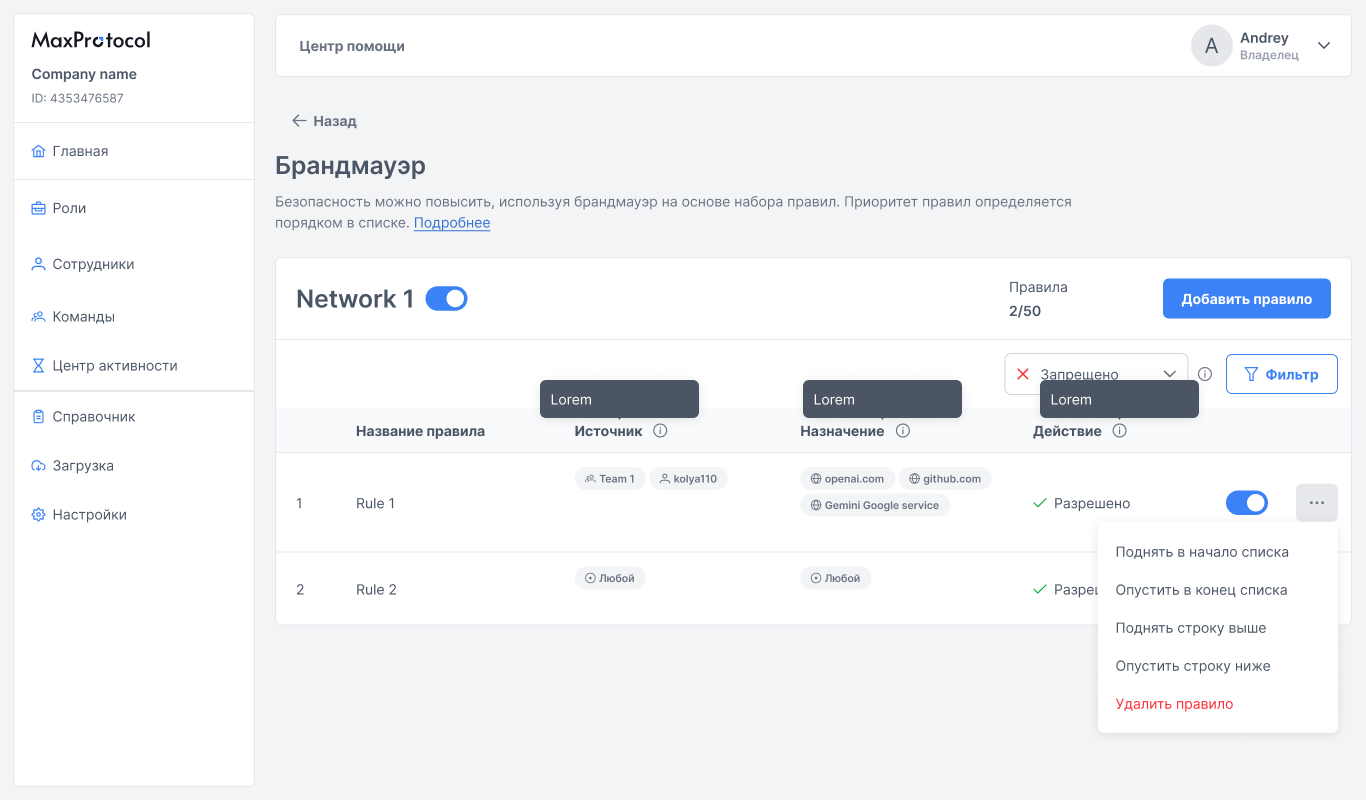
The top of the page shows:
- Network name and a toggle to enable/disable the firewall
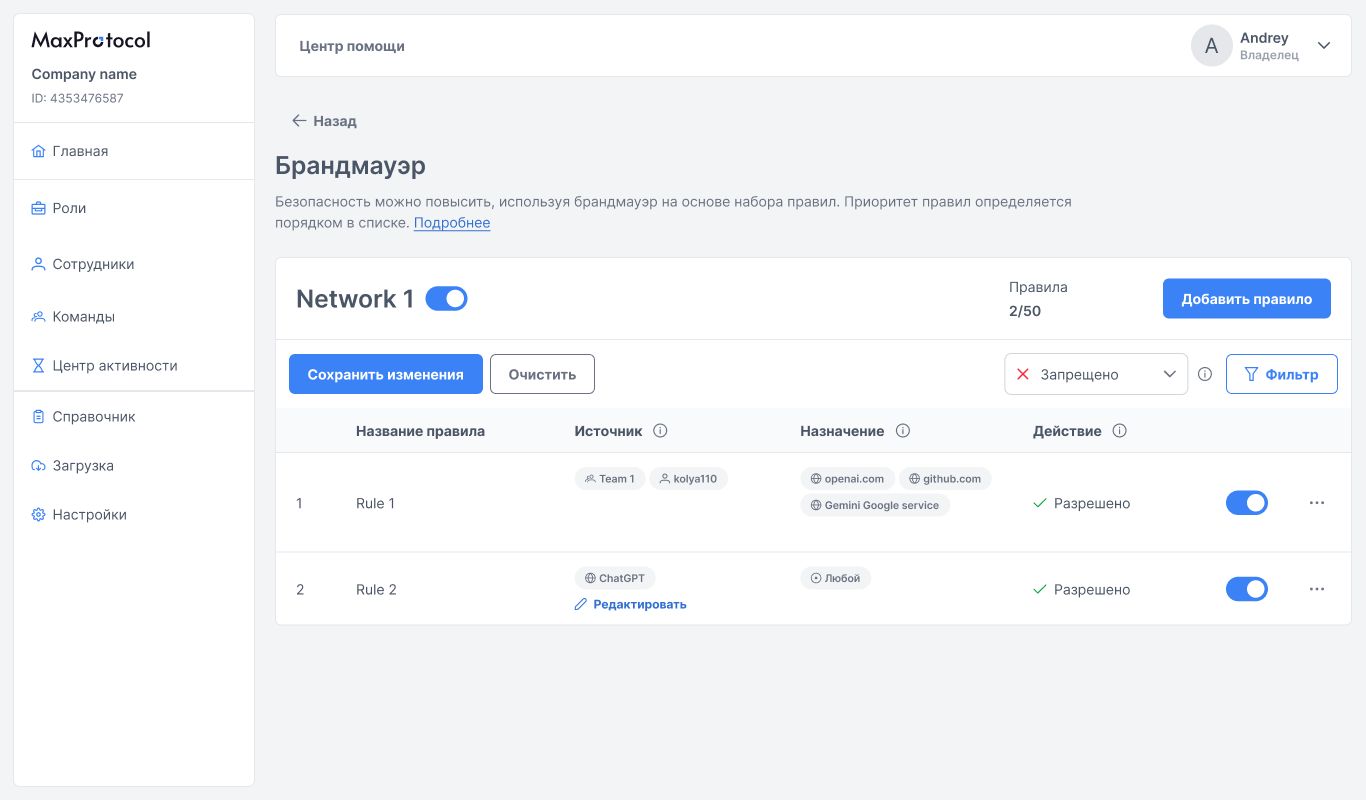
- Rule counter — current and maximum allowed number of rules (e.g.,
2/50) - Add Rule button
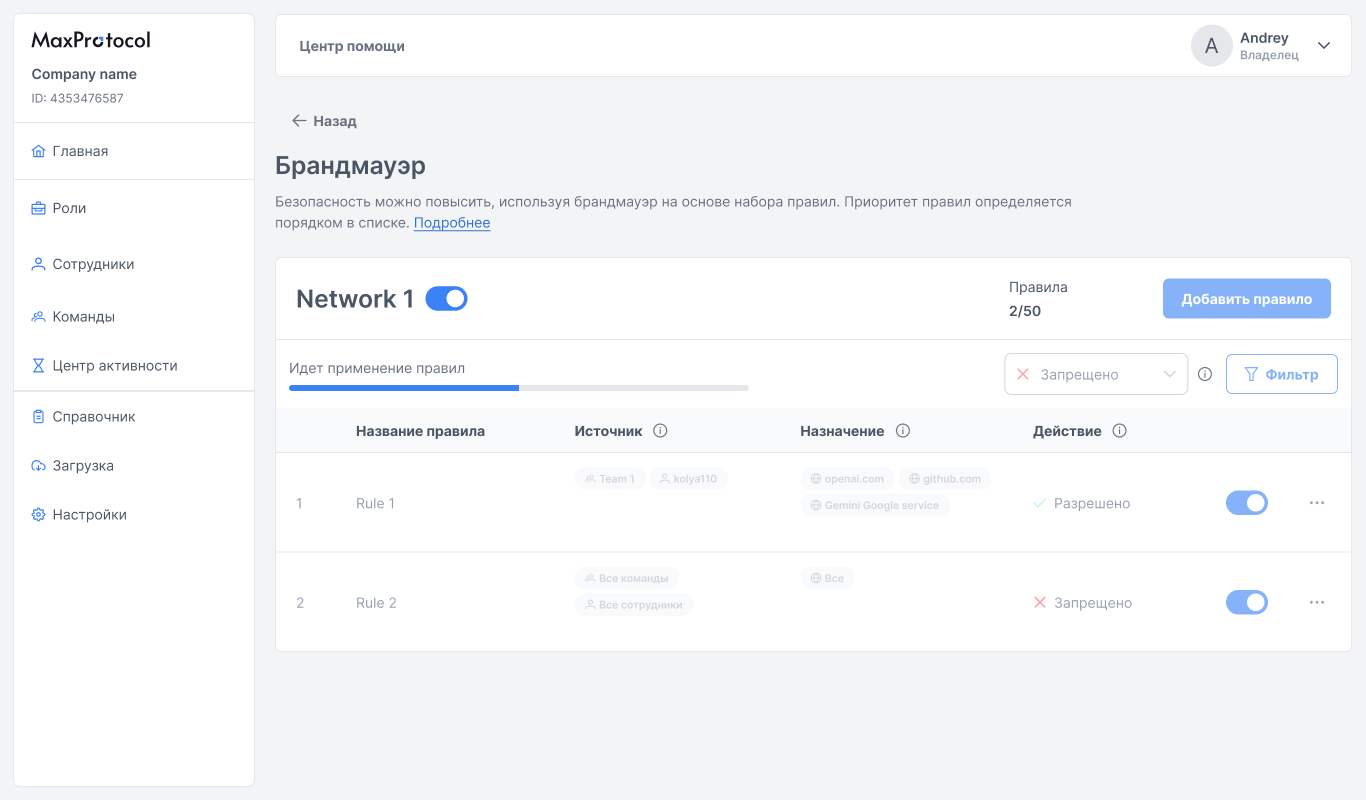
The maximum is 50 rules per network. The Add Rule button becomes disabled once the limit is reached, and also while rules are being applied to the network or if applying them failed.
Rules Table
| Column | Description |
|---|---|
| # | Sequential number — determines priority |
| Rule name | Name for rule identification |
| Source | Where traffic comes from: a team or an employee |
| Destination | Where traffic is directed: a resource from the Directory |
| Action | Allow or Deny |
The toggle in the rule row enables or disables an individual rule without deleting it.
Adding a Rule
- Click Add Rule — a new editable row will appear in the table.
- Enter a Rule name.
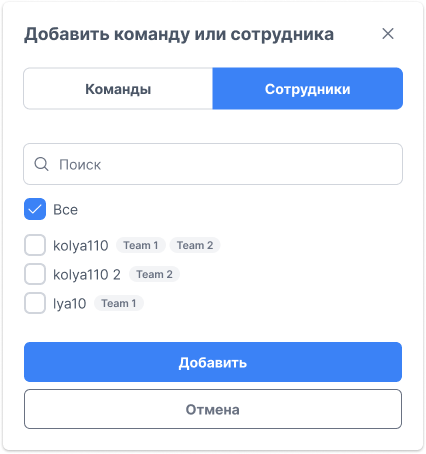
- Click the Source field — a dialog for selecting a team or employee will open.
- Click the Destination field — a dialog for selecting a resource will open.
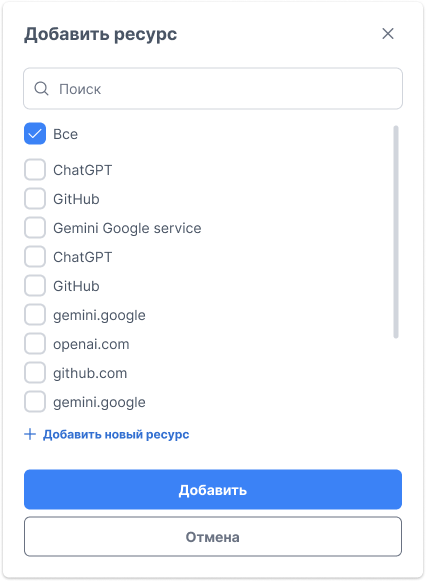
- If the required resource is not in the list, click + Add New Resource and fill in the form.
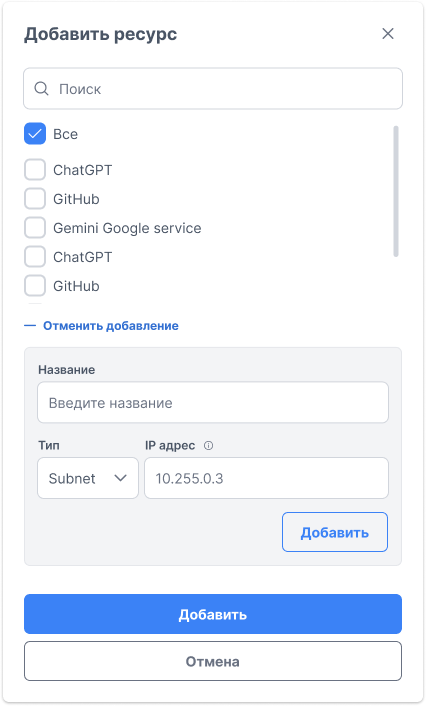
| Field | Description |
|---|---|
| Name | Resource name for display in the rule |
| Type | IP, Subnet, or List — the same types as in the Directory |
| IP address | The value matching the selected type |
- Select the Action:
AlloworDeny. - Click Save Changes.
TIP
Rules are applied top to bottom. Place more specific rules higher in the list — they will be processed first.
Editing a Rule
Click the Source or Destination field in an existing rule row to change its value. Save Changes and Clear buttons will appear.
Changing Rule Order
The context menu ⋯ in the rule row allows you to manage its priority:
- Move to top — move the rule to the first position
- Move to bottom — move the rule to the last position
- Move up — move one position up
- Move down — move one position down
- Delete rule — remove the rule from the list
Filtering Rules
The Filter button above the table lets you filter the rule list by action: Allow or Deny.
Default Action
The control panel above the table contains a default action selector for the network — Allow or Deny. It applies to traffic that does not match any rule in the list.
Applying Changes
After saving rules, the system applies them to the network — a "Applying rules" progress bar is displayed. The table enters read-only mode during this time.
Sources and Destinations
Source and destination draw on different sets of objects and cannot be swapped:
- Source — only teams (e.g.,
Team 1,Development) and employees (e.g.,John Smith). A single rule can list both. - Destination — only entries from the Directory: IP addresses, subnets, and address lists.