
Create a Network
In MaxProtocol, each network is an isolated virtual environment with its own subnet, regions, and gateways. A network can be created by a user with the Owner or Administrator role.
How to Create a Network
- Go to the Networks section in the sidebar.
- Click the Create Network button in the top-right corner.
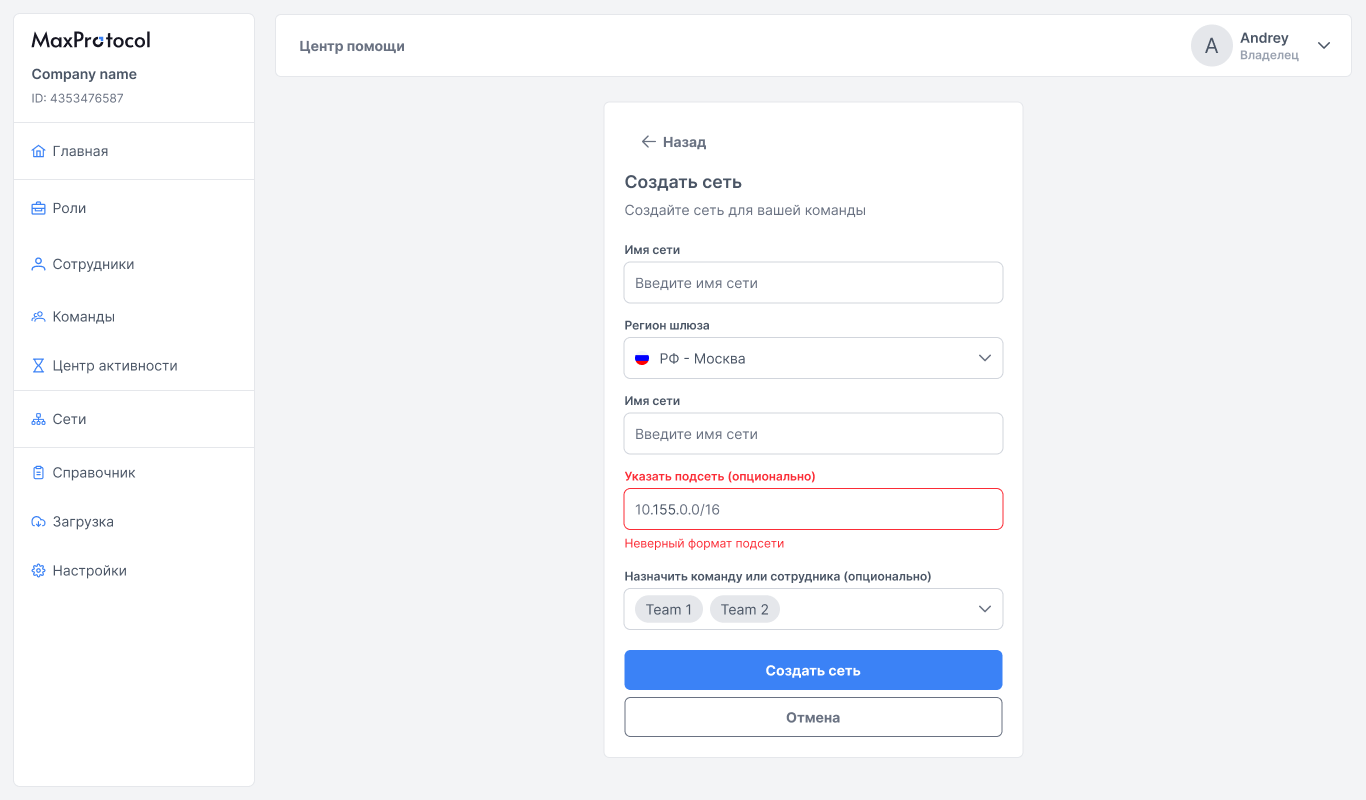
- Fill in the form and click Create Network.
Network Limit
An organization can have no more than 5 networks.
NOTE
Once the limit is reached, the Create Network button is no longer displayed in the Networks section. To create a new network, delete one of the existing ones or contact support to raise the limit.
Form Fields
Network Name
Enter a descriptive name for the network. The name is used for identification in the interface and is visible to all members with network access.
TIP
Use names that reflect the network's purpose — for example: Office Warsaw, Dev Network.
Gateway Region
Select the region where the first gateway will be deployed. The region determines the geographic location of the node. Additional regions can be added after the network is created.
Available regions (example):
- Poland — Warsaw
- Germany — Frankfurt
Subnet (optional)
The IP range of the network's internal address space in CIDR format — entered in full, as shown in the field hint: 10.255.0.0/16.
- The field is optional: leave it empty and the subnet is assigned automatically.
- If the format is invalid, an "Invalid subnet format" error appears under the field.
WARNING
The subnet cannot be changed after the network is created — in the Edit Network form the field is read-only.
Assign a Team or Employee (optional)
Select one or more teams or individual employees who will gain access to the network. The assignment can be changed later via Edit Network.
After Creation
After clicking Create Network, the system begins deploying the infrastructure. The network enters Setup status — the process takes about 10 minutes.
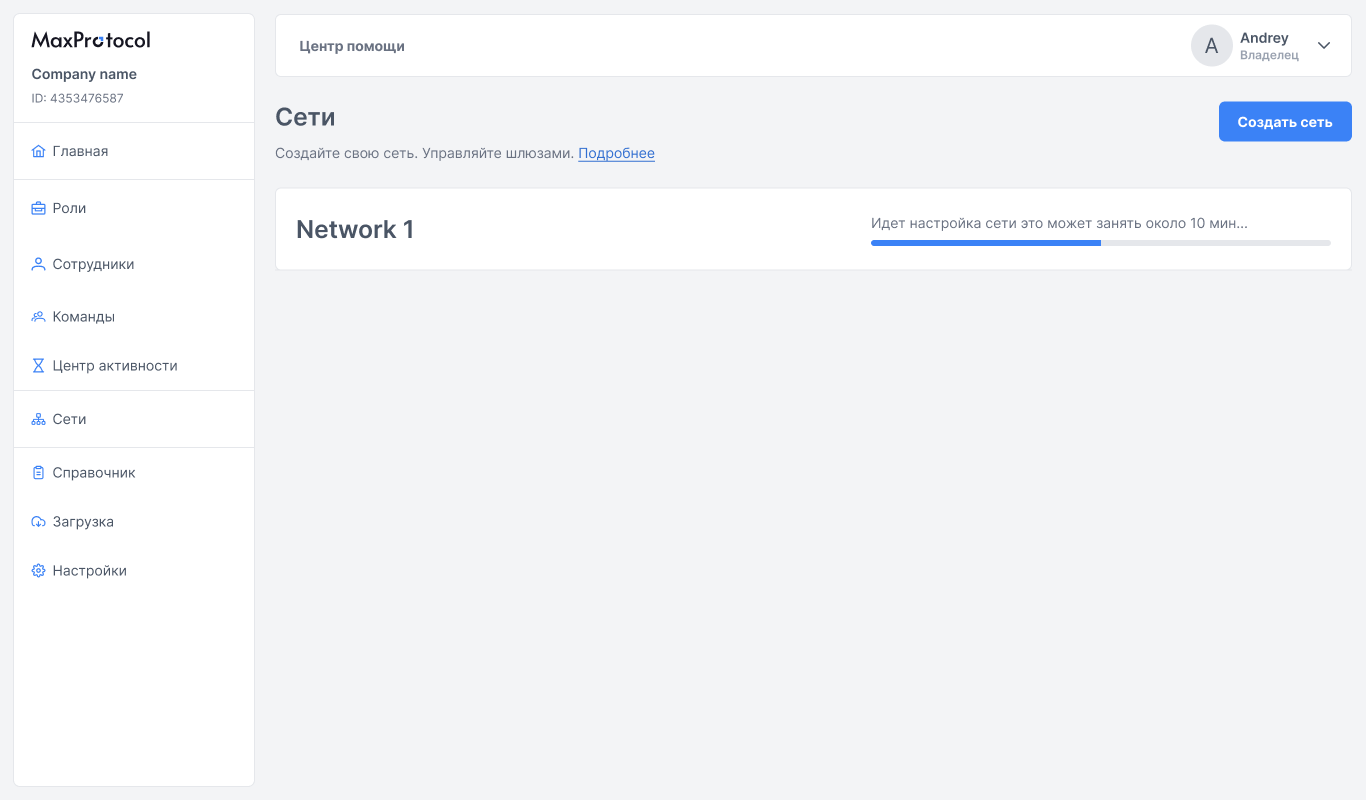
Once complete, the status will change to Active and the network page with regions and gateways will become available.
Next Steps
After creating the network:
- Add a gateway to the region — to enable tunnel connections
- Create a tunnel via a connector — to connect resources
- Configure the firewall — to manage access